
What’s one of the most overwhelming things about stitching a detailed silk shading embroidery? If you’re anything like me, it’s how do you keep a track of all those different threads?!
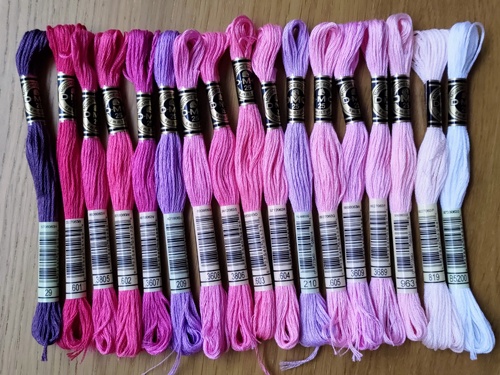
Let me share with you the challenge I faced. Lessons learned. And most importantly, what I’ve learned not to do!
For my Royal School of Needlework botanical silk shading module, the goal is to create a photorealistic embroidery. And the only way to achieve that is to use lots of different colours and shades of thread.
Rather than working with one shade at a time, the method taught is to have multiple shades on the go at once.
This makes sense as you take what I think of as a ‘sweeping’ approach to stitching your embroidery. Where you stitch each part of your flower (in my case) in a wave from one side to the other.
You’re changing colour so often that it would quickly get annoying to be constantly starting and finishing threads.
But then, how do you keep a track of all those different threads as you’re stitching?
Keeping a track of colours while silk shading
One thing you definitely want to do is to park your threads on the right side of your work. It’s certainly not a good idea to leave the working threads dangling at the back. All sorts of mess could quickly occur when you can’t see what’s going on!
In the silk shading that I’ve done before, I’ve had a maximum of 4 different threads on the go at once. And the threads have had a clear colour or tonal difference. So keeping a track of what’s what felt ok.
However with this project, almost straight away I had 8 different shades on the go…
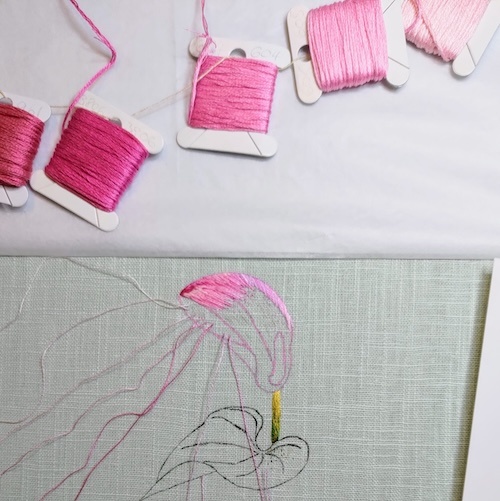
Then 13!

And the tonal difference between some felt very subtle.
So I started using a system that seemed very smart at the time to help me keep a track of everything.
Each thread had a dedicated ‘parking spot’ along a section of the flower that I wasn’t stitching yet. I lined up the threads in the same order as I’d strung the spools together, so that I also had that as a reference to help me.
This way I always knew where each thread was and where it should go.
A perfect solution.
Or so I thought.
Why this was a bad idea!
Sadly, I didn’t realise that this was a bad idea until much, much later.
When I came to stitch the turn over part of the petal in fact. It turned out that I’d made this section sooo much harder to stitch.
All that back and forth from the parking spots to the active stitching area meant that I’d created a lump of thread padding on the back of my work.
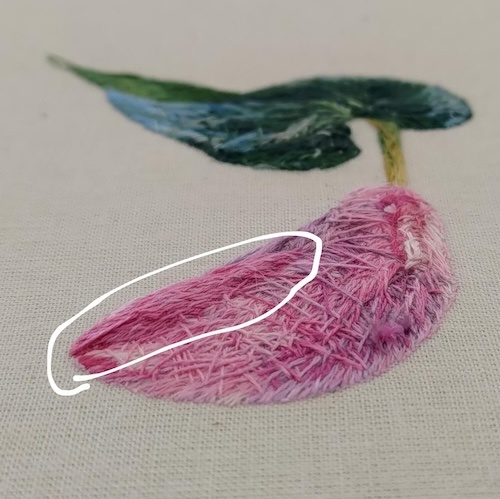
Which made the stitching of the turn over really tough going, because I had to stitch through all those threads. So I physically had a harder time stitching this area. And I wasn’t able to stitch it so precisely thanks to all those lumps of thread. Such a shame as this one was one of the last areas I stitched. And I’d finally felt I was getting the hang of the shading!

I then also became concerned about the effect this would have when I mounted my embroidery. With all that padding underneath, it seemed unlikely to lie flat against the mountboard.
Here, I got very lucky. When I tested out the look with my tutor, we agreed that it wasn’t actually too bad. Plan B had been to put a layer of soft padding across the whole mountboard. But that wasn’t needed.
An extra piece of luck was that the area with all the padding underneath is one of the furthest forward visually. My hope here is that any noticeable raising of this section adds to the 3D look of the embroidery.
What I should have done instead
Option 1 – Needle back through the exact hole
One option would be that every time I ‘unparked’ my thread, to take the needle and thread back through exactly the same holes as they came up in.
By not doing this (most of the time at least), I was instead creating a small stitch every time I started using the thread again. Which anchored the trailing thread at the back in place. Thus eventually creating the padding.
If instead, I’d been able to take the needle back through exactly the same hole as it came up in, then no stitch would be created. Preventing or severely limiting the amount of thread padding built up.
While this is theoretically possible, in reality, with the two layers of fabric I was stitching through, much as I tried, this generally didn’t happen.
To be honest, even if I had managed it, I suspect a bit of padding would still have been created. Simply as a consequence of the number of threads crossing and twisting with each other at the back.
Option 2 – Park threads just ahead of where I’m stitching
Another option is to use a different thread parking strategy. By parking my threads just ahead of my stitching.
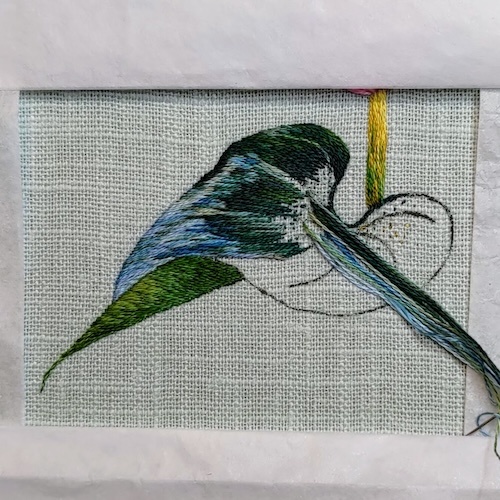
Which is what I did when I was stitching the leaf and the rest of the petal. This minimises the distance that the thread is travelling across the back of the embroidery. And the threads across the back travel with my stitching rather than being concentrated in a particular area.
The downside to this is a less ordered approach. But I think that’s all a part of the learning curve of this type of silk shading.
It certainly got easier as I got more used to the process. As a side note, this is an extra reason why good lighting is essential for this type of embroidery!
I did use a bit of my previous structure to thread parking where I could. In the sense of lining up the threads by colour and tone. But it was always done just ahead of where I was stitching. And so it was much tighter than before!

Extremely tight at some points…!
Final thoughts
I’m sure you’ve heard the old adage that an embroidery’s back should be as neat as its front.
I’ve gotta say, I found it very refreshing to discover that no one sees the back of your embroidery during RSN assessments. For me, debunking the need for neatness on the back.
What I’ve taken away from previous modules is that if the back doesn’t affect the look of the finished embroidery, then it can be good and messy!
Hopefully in this case, you can learn from my mistakes though. And remember that messiness that creates a load of thread padding can not only affect how your embroidery looks when mounted. But can also make your later stitching harder than it needs to be. So best avoided!
Curious to see more of my progress on the RSN Certificate? Check out my other posts here.
In just about to start my submission piece for the Jacobean module. I hope to go to post-diploma but that seems unattainable. Sadly a difficult set of personal circumstances means I’m behind, but my tutor is wonderful, as are the rest of my online cohort
Ooo, I hope you enjoy working on your Jacobean module! I’ve taken a lot longer to work through the certificate than I expected, but it’s been worth persevering. Bit by bit you’ll get there and I’m a firm believer that anything’s possible!