
Satin stitch is often one of the first stitches that you’ll come across when getting into embroidery. Which lulled me into thinking it’s an “easy” stitch. Actually, I found it one of the trickiest stitches to work to the standard expected by the Royal School of Needlework for my certificate piece.
Maybe that’s just me and for you it is an easy stitch. I hope so!
Just in case, let me share what I’ve learnt…
Foundation
At the Royal School of Needlework (RSN), I’ve been taught to create a split stitch foundation before working satin stitch.
It’s obviously not compulsory to do this. Unless your stitching is going to be assessed by the RSN!
Although, now that I’ve been taught this way, I do it as standard for a couple of reasons:
- It helps me to create a really smooth edge to my satin stitch.
- It raises the stitch up slightly which adds a nice sense of depth to my embroidery.
So, to create a split stitch foundation, simply work a line of split stitch all around the edge of your shape.
Keeping your stitches as small as possible will create a more stable foundation. In my split stitch tutorial you can see the difference between using smaller and larger stitches.

Satin stitch
To ensure your embroidery looks it’s best, start with a new piece of thread. Even if you’ve got some left after your split stitch. All those small stitches cause a fair bit of wear on your thread and we want your satin stitch to look it’s smoothest best self!
Start by bringing your needle up on one side. Angle your needle out from just under your split stitch. You don’t want there to be fabric visible between your needle and the split stitch.
Take your needle down on the other side of your shape. Again, angle your needle so that it goes just under your split stitch. You want to get as close as you can to your split stitching, without stitching through it.

Bring your needle back up next to where you started your first stitch. In other words, so that your shape will also be fully covered on the back of your work. Then take your needle down next to where you ended your first stitch.
Keep working stitches in this way so that you fill your shape with parallel stitches that sit next to each other but don’t overlap.


Satin stitch thoughts
Sounds simple enough right?
In theory, yes.
In practice, I’ve had a fair bit of trouble getting my stitches to sit next to each other correctly. “Correctly” meaning that the individual stitches are all parallel to each other with no gaps between them and looking nice and smooth.
I also struggled at first with creating a really smooth edge.
For me, both definitely got easier with practice.
This feels like a good point to reassure you that there are no embroidery police around here! For me, there are so many benefits to relaxing and enjoying the stitching process, that the last thing I’d want to do is make anyone worry about whether their stitching is “good enough”. It is.
In the case that you enjoy learning, or if your stitching is going to be assessed and you want to make sure you’ve put your best foot forward…
Here are my tips for perfecting satin stitch.
Satin stitch tips
Starting in the middle or widest part of your shape should make it easier to keep your stitches parallel across the whole shape. I start across the middle, fully stitch one side of my shape, then come back to the middle to stitch the other side.
Satin stitch is best used for filling small areas in your embroidery. If your stitches get too long, they won’t sit next to each other so nicely and you’ll probably see some gaps in your stitching. For larger areas where you want your stitching to completely cover the fabric, long and short stitch or laid work are good alternatives. Or maybe you’ll be inspired by some of my other stitch tutorials!
Holding your thread across your fabric can help you to judge where to take your needle down. I find this especially helpful if the edge I’m stitching is angled.
If you’re working a circular shape, try not to make your stitches too short at the edges as your curve might look a bit jagged. Or even slightly pointed. I find it looks best if I keep my last stitch nearly the same length as the one before it while coming up from and going down slightly under the previous stitch. To put that another way, for the last stitch, I bring my needle up at an angle from slightly under my previous stitch. And then I take the needle down at an angle, kind of tucking the it into my last stitch.

Angled satin stitch
If the shape that you’re filling curves around a lot, you’ll probably want to deliberately change the angle of your stitches so that your satin stitch flows smoothly around the curve. For the best results, change the angle of your stitching gradually. The way you’re working your stitch can make this easier or harder. So if you are starting your stitches on the left (or top), but having a hard time, try starting on the right (or bottom) instead. I find it easiest to take my needle down into the shorter curved edge.

An extra tip for working satin stitch that’s curving is to draw yourself some guidelines within your shape. Then you’ve got a nice visual guide and a target to work to. I tend to use a B or HB pencil for this.
Enjoy!
I realise that can all sound like a lot to think about! At the end of the day, the most important thing is to enjoy your stitching.
And remember that your embroidery will almost never be looked at as closely as when you are stitching it! I’ve often felt less than happy about my stitching while I’m working it. But then I take a step back or look at it later and wonder what I was worrying about!
This is a revised and updated version of a post originally published in December 2020.
Next steps
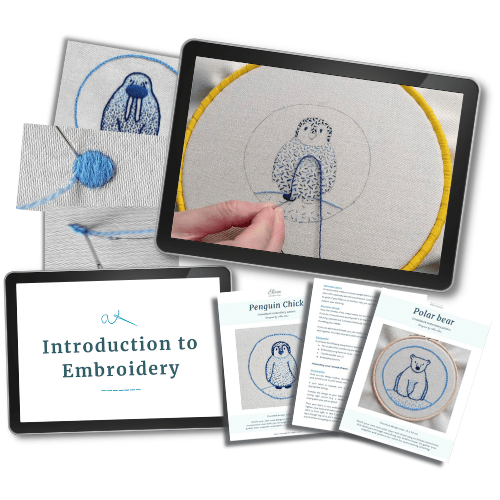
Would you like more guidance on satin stitch and 3 other foundational embroidery stitches?
Check out my Introduction to Embroidery self paced course!
I’ve been taught this stitch at two RSN classes and still struggle! The tips about how to avoid a jagged edge and changing side when it’s a very curved shape really useful- I might have missed those in classes! Thanks so much for a really good tutorial.
Great to hear the tips are useful Mel! I think I picked them up across a few classes and different teachers, as well as a bit of my own trial and error. I kind of like that there’s always more to learn 🙂
Thank you for sharing such heipful advice. I’ll certainly try using a split stitch border in future….and the way things are going with the virus it could be that I have plenty of time to do that!
When I’m doing a shape where the angle of stitches has to change I draw a few guide lines every so often with an air erasable pen which I find helps me to see what I’m aiming for.
Best wishes for the festive season to you and yours.
I’m very happy to hear you’ve found this helpful! Yes, looks like we’ll have plenty of time for stitching in the coming months. That’s a great tip with the guidelines, especially when the angle is changing. I’m all for anything that makes my stitching easier!! 🙂
Best wishes for the festive season to you too.