
I’ve just finished writing a coral stitch tutorial for a new pattern and kit (more on that near the end…). So I thought it’d be a good time to add it to my web tutorials as well!
I especially like using coral stitch to add some texture to my embroidery.
I’ll talk more about how I like to use it in a bit. But first let’s jump straight into how to stitch coral stitch!
How to stitch
Bring your needle and thread up at the start of your line. Then hold your thread across the top of your fabric, along your stitching line.
Take your needle down to one side of your thread. As you pull your thread through, leave a loop on the front of your embroidery.
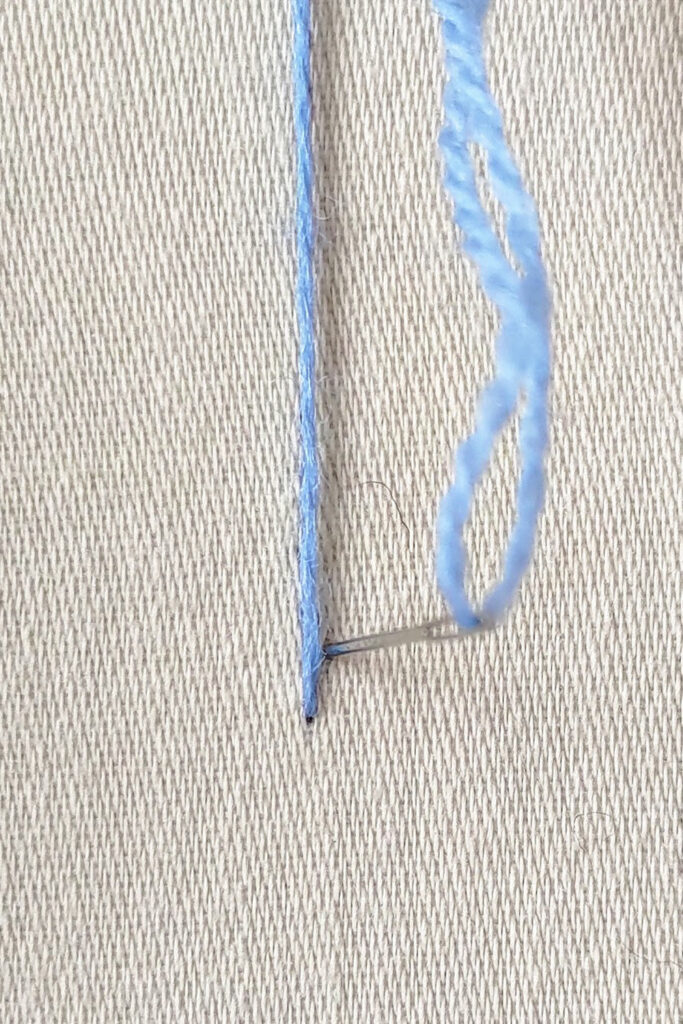
Bring your needle back up on the other side of your thread and inside the loop of thread.
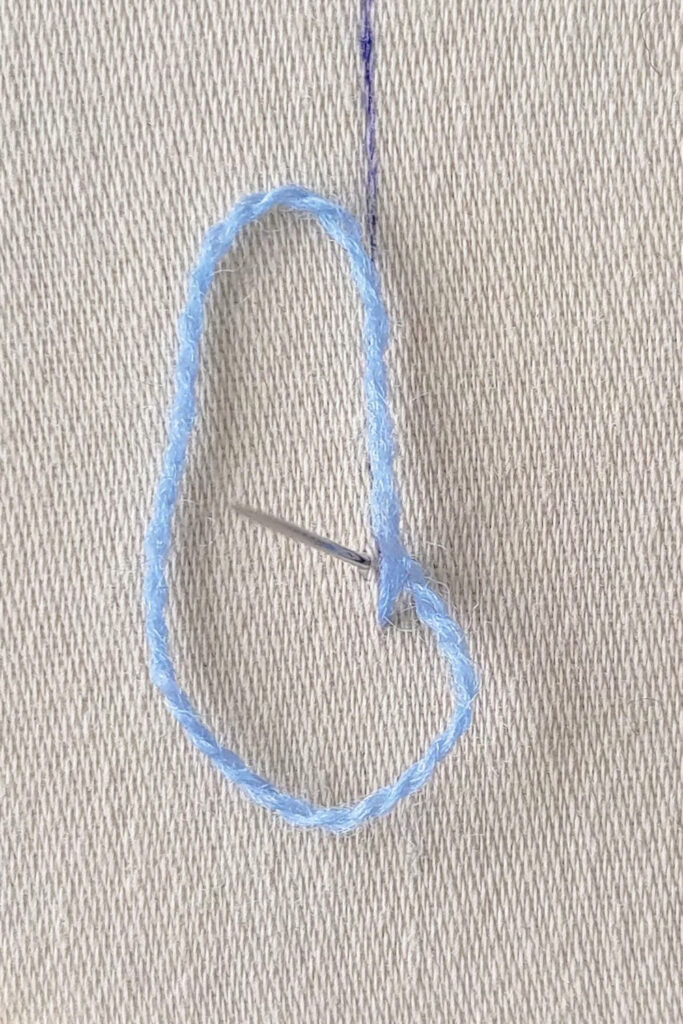
Pull your thread all the way through to form a knot on the top of your work.
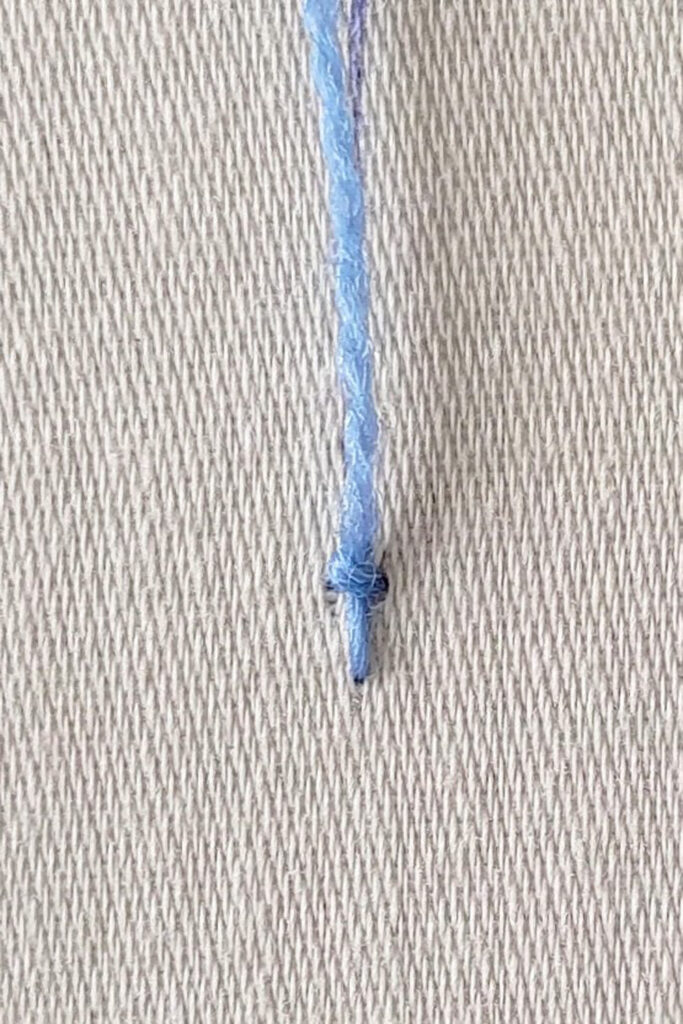
Keep stitching in this way. At the end of your line, take your needle back down into the fabric as if you’re working a straight stitch.
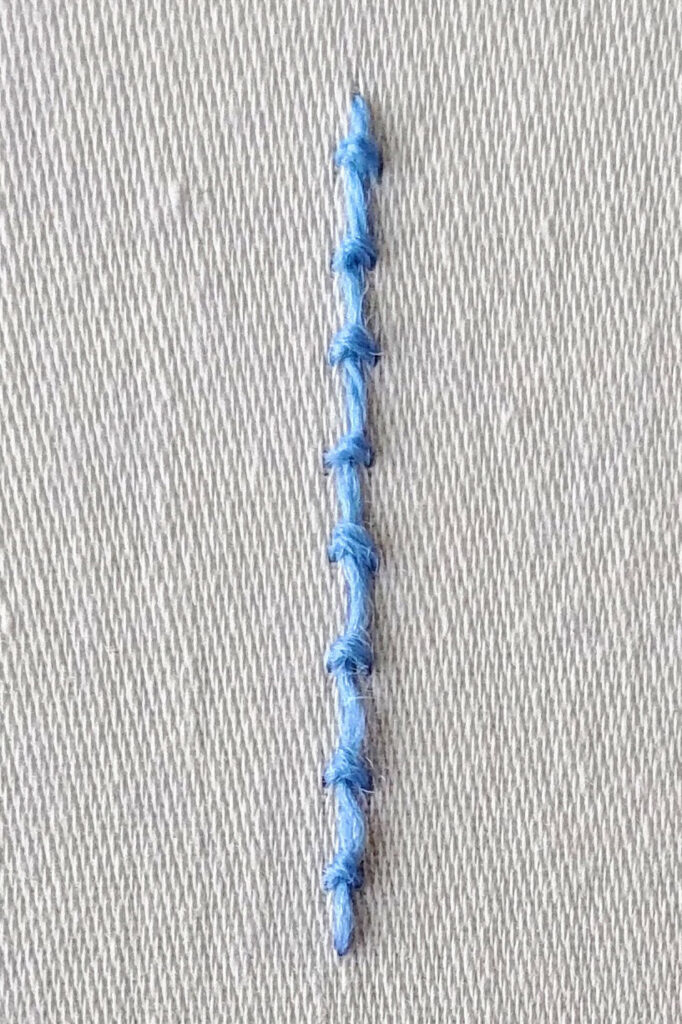
Coral stitch tips
To create neat and even knots, I find it helps to pull my thread through in two stages. First, I pull the slack loop through to the back of my work. Then, I pull up all the thread from the back, pulling in the direction my stitching is going.
Another way to ensure all your knots look consistent is to always take your needle down on the same side of your thread. The way I do this is to use a variation of my ‘follow the compass’ rule I use for stem stitch. So if the direction of my stitching is North, then I always take my needle down to the East of my thread.
Most stitches look better if you keep your stitch length consistent. I find this is especially true with coral stitch, since the knots make the stitch length more noticeable.
If you’re using coral stitch around a tight curve, I find it looks best if I make sure to position a knot at the sharpest part of the curve. I’ve also found that this makes it easiest to ensure that my stitching fully covers my design line.
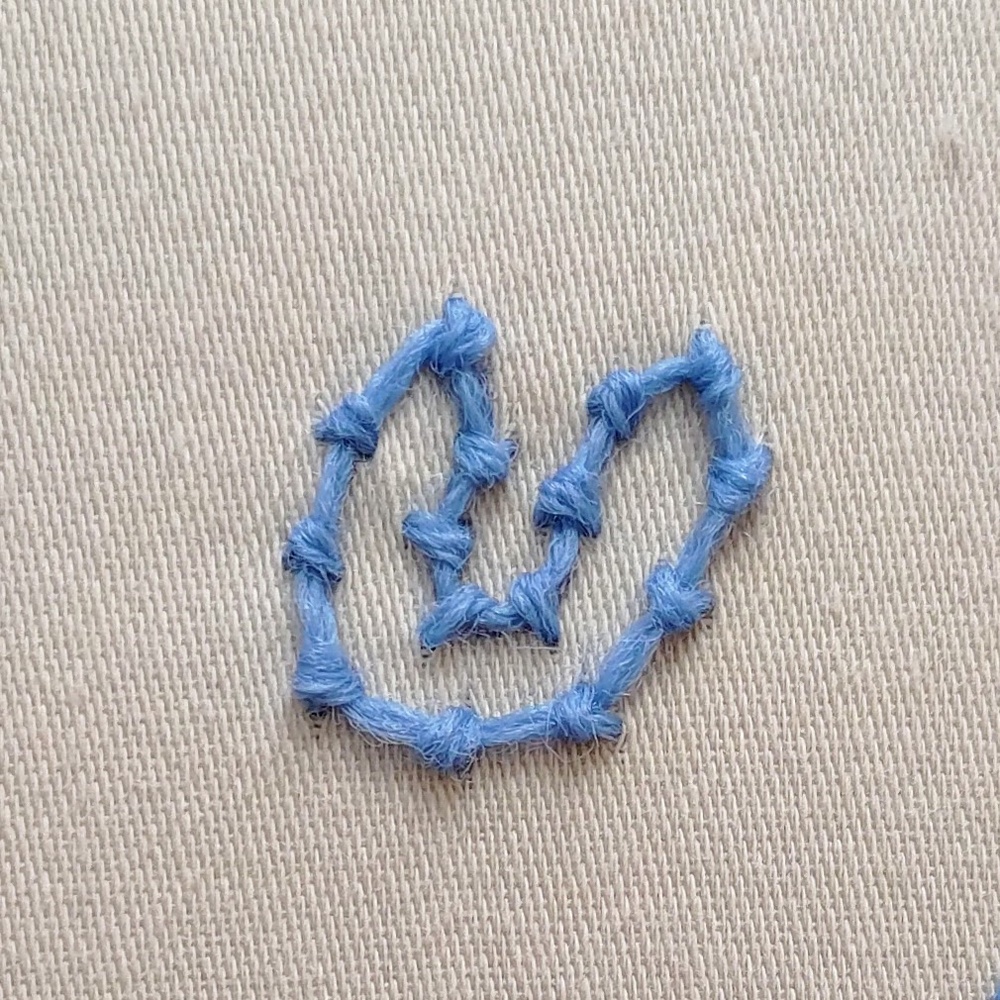
How many threads?
During my Royal School of Needlework crewelwork module, I was advised to use two threads of crewel wool in my needle for coral stitch.
The point of using two threads is to even out the wool fluctuations, making for a consistent thickness to your stitching line. Personally, I also usually like the chunkier knots and more prominent line that this gives me.
You can of course use a single thread if you want a finer line. Just be aware that the natural fluctuation in thickness of the wool thread may be quite apparent.
Since I always like to see things for myself, here’s a couple of lines of coral stitch. On the left is a line stitched with 1 thread and on the right is one with 2 threads in the needle.
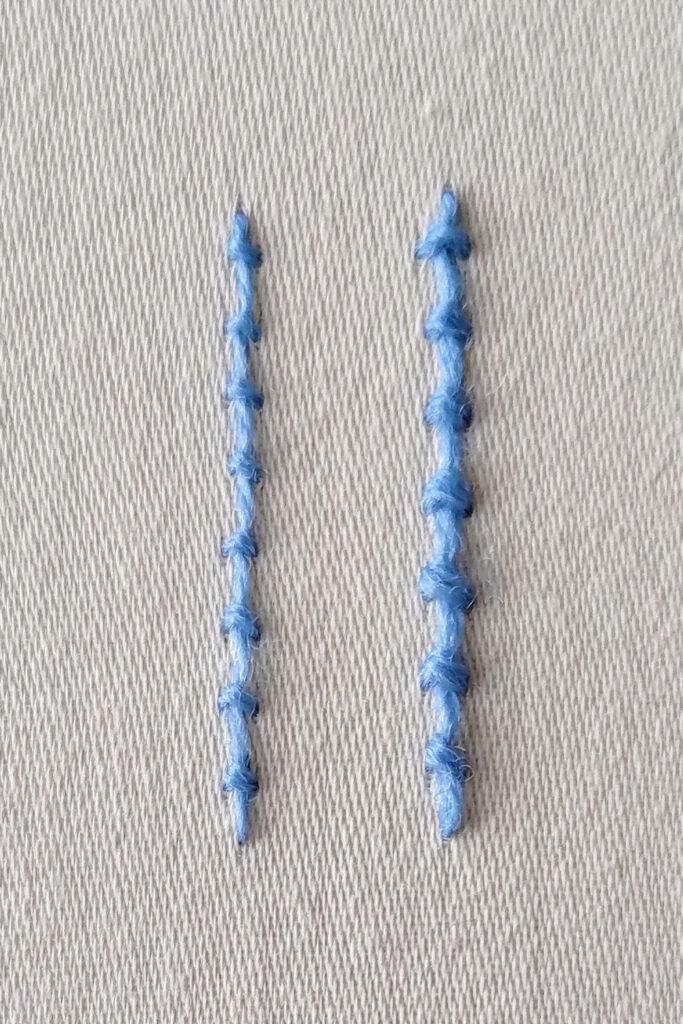
If you’re using a thread that always has a consistent width (like stranded cotton), then the only consideration when choosing your number of threads/strands is how thick you want your stitching to be.
Using coral stitch
Any line that you’d like to be textured is a great candidate for coral stitch.
If your embroidery design has a lot of line stitching, I think it’s great to use a bit of coral stitch as a compliment to other line stitches that tend to have a smoother appearance.
One of my favourite things about writing these tutorials is thinking about the different ways I might use a stitch. So I’ve stitched a couple of experiments in using coral stitch as a filling stitch…
First up, I thought I’d see how it looks when stitched in rows.
With the knots, it’s worth thinking about whether you want them all lined up or offset in a brick pattern. I tried both:

Then I was curious to see how it would look stitched in a grid. Perhaps this could be an interesting alternative to trellis stitch?
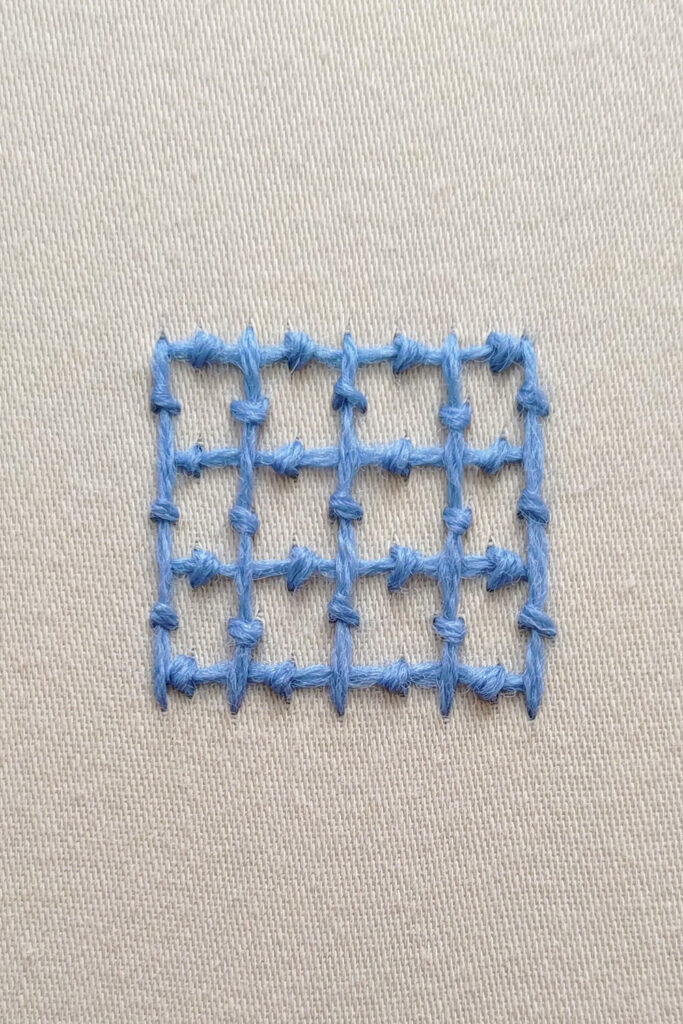
Maybe you could have some fun experimenting yourself! I love to hear how stitch experiments go 😀
For a more traditional use, I’ve often used it when stitching vines in my embroideries. Like this twisting vine in my upcoming crewelwork fox pattern and kit:
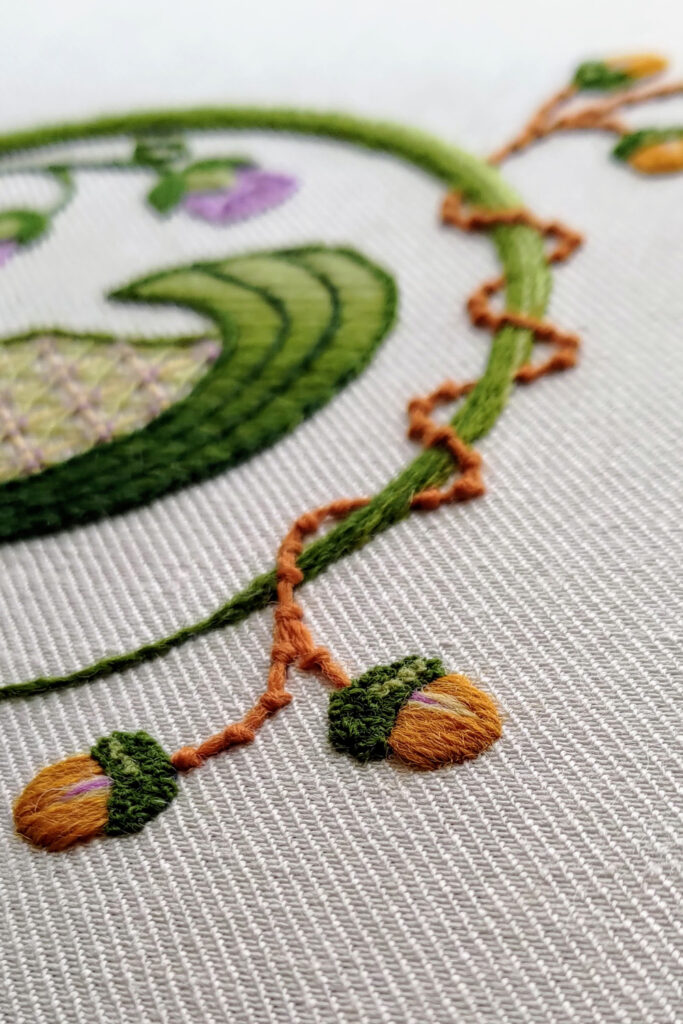
Do you have a favourite use for coral stitch? Or are you feeling inspired to try it for the first time? I love to hear about your stitching plans!
I’m using coral stitch for the trunk and branches of the tree in my Jacobean submission piece. I am packing the knots quite tightly together, with the knots of each subsequent row nestling into the thread between the knots of the previous row. If that makes sense?!
The densely packed knots give a great bark texture
Ooo, yes, that makes sense and sounds like a really creative way to use the stitch, I love it! Good luck with the course!