
Having completed my blackwork portrait of Bracken, I’m now half way through the Royal School of Needlework (RSN) certificate. My next module is botanical silk shading, for which there’s A LOT of preparation to do!
I shouldn’t really be surprised by this point in my RSN journey. 😂
And I’ve certainly felt that the preparation for my previous modules was beneficial.
My first challenge was finding a suitable photo.
The brief for this module is quite exacting. Since this is botanical silk shading, my subject needed to be either a flower, fruit or vegetable. My design also needed to include a stem and leaf.
Sounds simple enough so far.
But then the extra elements start kicking in…
- Your design needs to have at least one turn over (a leaf or petal that is turning or twisted such that you can see both sides of it).
- Your photo shouldn’t be over exposed or have any harsh shadows.
- Flowers with intricate details on their petals or leaves are out.
- Then there are size requirements for both the flower and overall piece.
This is all before you start talking to fellow students and tutors for additional advice. Such as certain colours are harder than others because there are fewer thread options (red and yellow I was told).
To be fair, all the requirements and advice make sense. Most of them are to ensure you pick a suitable image and don’t make the project too difficult for yourself.
It still felt like a lot to consider though!
My image
Since I wanted to use a photo I’d taken, I started the scout for suitable flowers well in advance. I’m glad I did!
Any time I went out to some gardens, I was on the hunt for a flower that I liked AND that I could photograph in a way that met the brief.
One of the challenges was getting the right light conditions. I took a couple of photos on very sunny days, but they wouldn’t work because the bright light drowned out the colour variations.
I’ve never been that into florals, so I tried a few vegetables. But didn’t find anything that really grabbed me (and that I could make fit the brief).
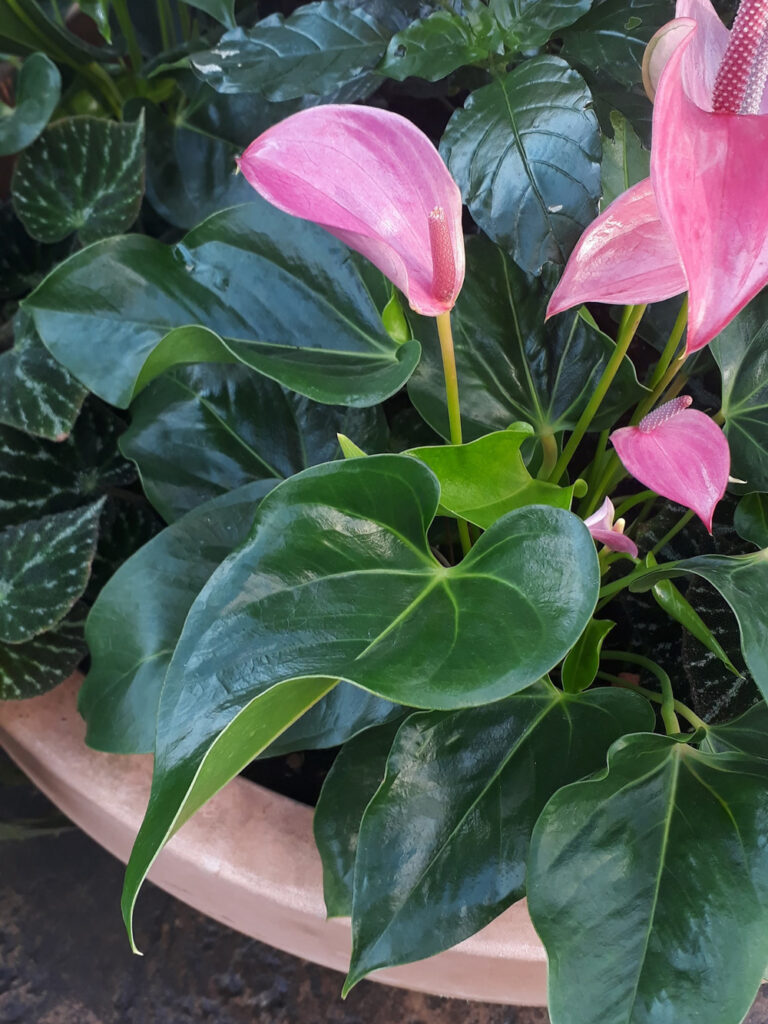
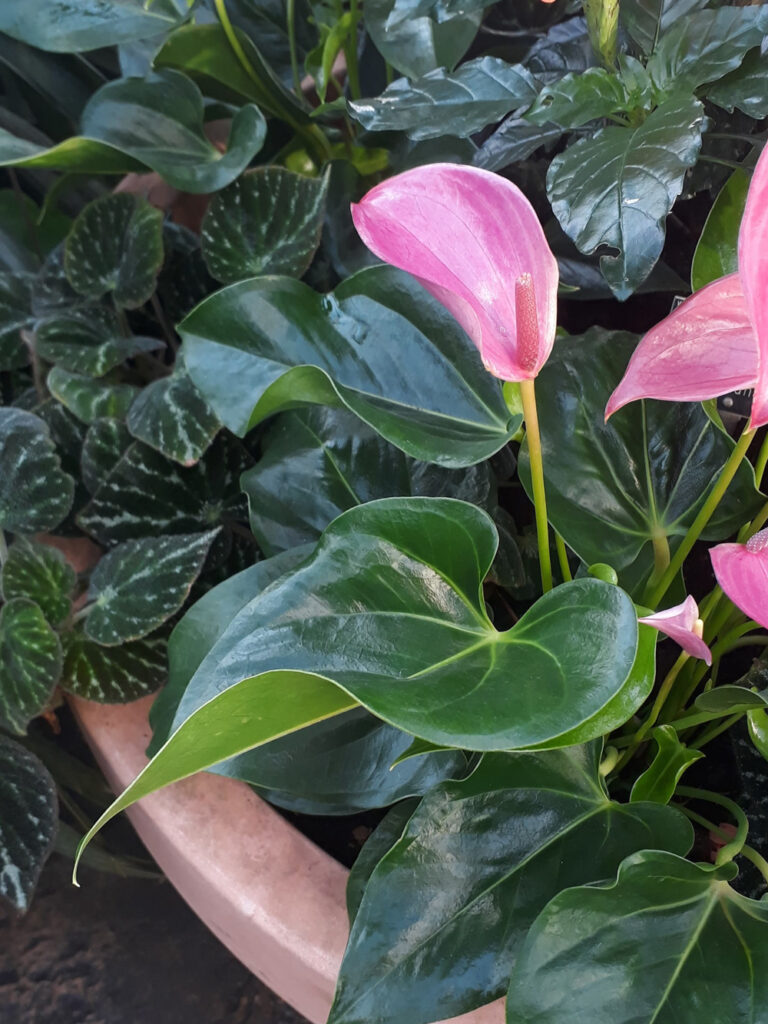
I eventually landed on a couple of photos of a peace lily taken at RHS Wisley. My Dad was roped in as an assistant to keep other leaves out of the way and not casting a shadow.
Preparing the design for silk shading
I needed to make some adjustments to my photo to get the flower and leaf ready for silk shading.
As you can see, in real life the leaf is a fair bit larger than the flower. So the first thing I needed to do was rescale them so that they were more comparable in size.
I also adjusted the position, bringing the flower closer down towards the leaf. This was to help the design fit within the size constraints of the brief.
I had two photos of the same flower and leaf that I liked, so I made these initial adjustments to both photos before getting feedback from my tutor.
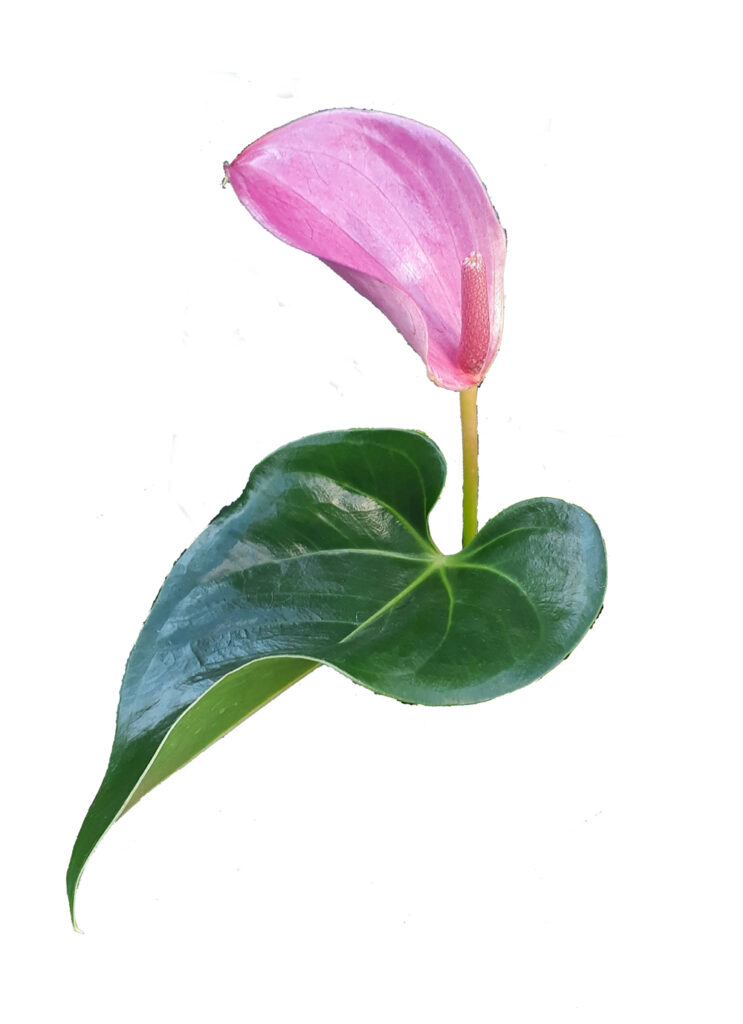
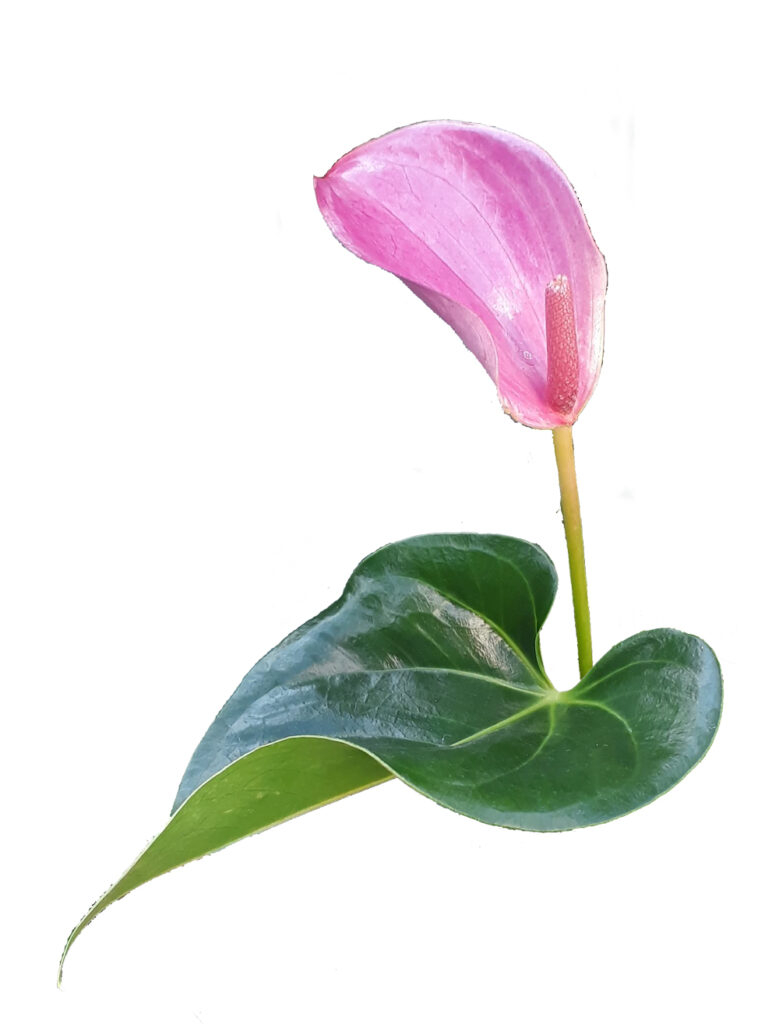
My tutor recommended using the flower from one photo with the leaf from the other. I think this was to get the best combination of shape and turnovers from both the perspective of a pleasing design and thinking about how it would be for me to stitch.
One of the things the silk shading brief warns you about is ensuring you have a consistent direction of the light source if you’re combining multiple images. My tutor checked the position of the highlights on the flower and since they are pretty much the same in both photos, this worked.
She also gave me some advice on rescaling and confirmed that the size guidelines should be used to determine the appropriate size in terms of surface area rather than the strict dimensions given.
So after a bit more tweaking in Photoshop, my reference image was ready.
But that was just the start of my silk shading preparation!
Getting to know my image for silk shading
Once your reference image has been chosen, there are a few extra steps.
The purpose of these steps is to help you get to know your image, so they’re well worth doing. Even though it can be very tempting to want to start stitching as soon as possible!
First up, I did a tonal drawing of my design.

I’ve done a few drawing classes in the past, so I was comfortable with this step.
Then I did a colour drawing.
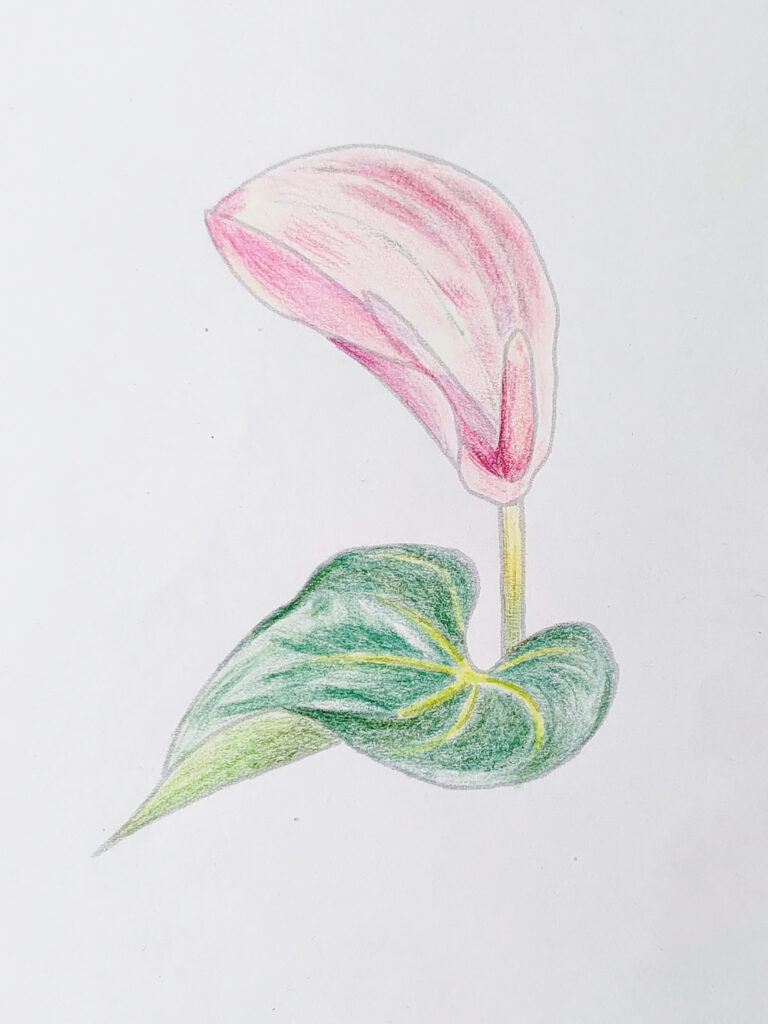
I found this a bit trickier as my set of 50 colouring pencils didn’t have any pinks that were a good match for the colour of my flower.
So it became an interesting exercise in seeing if I could blend the colours I did have to get closer to the actual colours.
I didn’t get that good a match, but I figure that the most important part of this step is to really look at and analysis your design. So I certainly did that!
Picking my fabric
As per the brief, you need to work your silk shading on either silk or linen. The default seems to be to use silk, but for ethical reasons, I wanted to use linen. Sarah Homfray has a great selection of colours of linen for embroidery so I ordered a few options to review with my tutor.
Prior to ordering my fabrics, I’d created various digital images of my design to try out different background colours. I found this really helpful for quickly judging the colours that worked better.
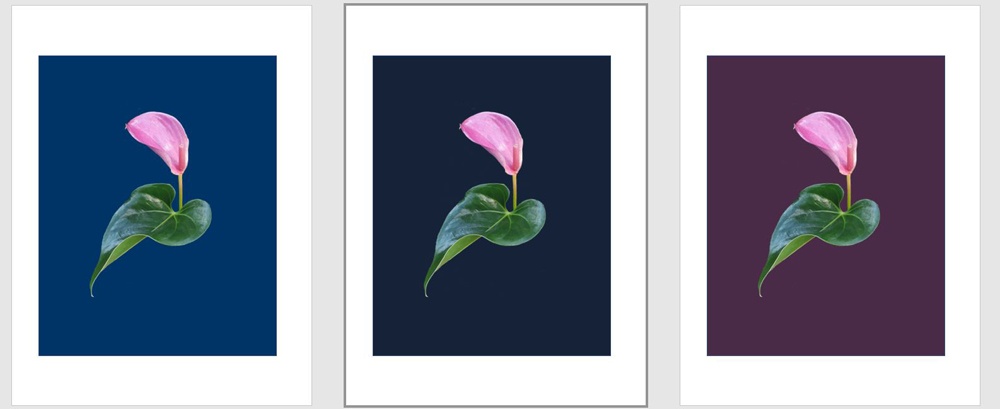

Based on this, I ordered a few different shades of blue.
To help me assess how my design would look on the different fabrics, I printed out an actual size version that I cut out. I could then place this cut out on each fabric in turn to judge the effect.
I’d been quite keen on a navy blue fabric as I liked the way this made the flower pop.
However, my tutor was concerned that it was too similar to part of the edge of the leaf and so that bit of the leaf would get lost.
The other option I liked was a mint green, so we agreed to go with that.
Preparing for stitching
Still more preparation to do for my silk shading…
The next step was to create an order of work and stitch direction diagram.
My order of work was fairly straight forward if I simply followed the rules that the RSN have for this. In that I should start with the sections that sit furthest back and then move forward from there.
For my design this means that the stem should be stitched first and then I stitch section by section for the flower and leaf. Since my flower and leaf don’t touch, I’ll be able to work on them independently.
My stitch direction plan took a bit more thought.
Some parts I found quite straightforward as I can use the visible veins as guidelines. However it was at this point that I realised I’d perhaps given myself more of a challenge than I realised as some of the curves in the leaf will be pretty tight!
I felt less confident about the appropriate stitch direction around some of the sides of the flower. I’m also a bit unsure about the base of the flower. So I’ll be looking for more guidance from my tutors around there.
Transferring my silk shading design
Despite having a few open questions, I’d gotten my silk shading preparation to a point where I was ready to paint the design onto my fabric in class.
I always find this step a little nerve wracking! Painting on my fabric feels quite final and I’m conscious of keeping as steady a hand as possible. Luckily, this design is considerably smaller than my crewelwork, so the painting didn’t take too long.
The RSN use the traditional prick and pounce method for transferring the design.
For this, I first traced my design outline onto tracing paper. Then I made lots of holes along the design line with a needle (the pricking part).
Your pricked design is then positioned as desired on your fabric. Then you apply the pounce (a fine powder) over the top of your traced design and gently rub it in so that the pounce falls down each of your holes onto your fabric.
You then carefully remove the design and use the pounce dots as guidelines to paint on your design.

A fun bit comes at the end where you turn your slate frame over and bash the back of your fabric to remove any loose pounce.
Ready for some stitching
Phew, what a lot of preparation for this silk shading module!
While there’s a lot of it, I do trust that the RSN requires it all for a good reason. Namely helping you to complete a piece of high quality stitching.
I certainly feel a lot more familiar with my design now, which I’m sure will stand me in good stead for stitching.
In my next RSN certificate post, I’m looking forward to sharing my first bits of actual stitching with you!
Found this fascinating. Am sure the finished piece will be beautiful.
Thanks Mel! Having procrastinated for ages on getting going with this module, I’ve now become slightly obsessed 😀 Hopefully I’ll have more to share soon!
Started introduction embroidery last October hence your Fruit of Life in December Stitch was a wonderful follow-up to my learning – thanks Alex.
Hi Elizabeth, I’m so happy to hear you enjoyed the Fruit of Life project! I hope you’re enjoying your journey into embroidery, I still get excited about all the things I want to learn and try out 😀
What a blessing to have Sarah Homfray as your tutor. Such an involved project. I’ve been watching an Asian girl paint with silk threads on YouTube. Her works are huge and so beautiful when finished. Of course you have strict guidelines to follow at RSN, but the thought of learning there makes me a bit giddy! I’m studying the history of embroidery on my own. I’ve been collecting books and there is so much to absorb. Thank you for sharing your journey. I’m glad they posted you on Pinterest and I stumbled across your blog. I’m in Texas, USA.
Cerise Cherry
Hi Cerise! Thanks for your message. 🙂 Yes, it’s such a privilege to be studying at the RSN! There is indeed so much to learn and absorb, plenty to keep the creative juices flowing and I love seeing the huge variety of techniques and different people’s interpretations of them. I’m keen to learn more about the history of embroidery myself, if you have any favourite books please do share! Sending a big wave to Texas!