
In my last post about my silk shading module for the Royal School of Needlework (RSN) certificate, I shared a lot of the preparation work. Of which there was a lot! However, that wasn’t all!! I still needed to pick the thread colours for my silk shading. And of course there was some sampling to do!
Since the aim of this module is to create a realistic looking image, you need to use a good number of different threads to capture all the colours of your botanical subject.
However, too many different thread colours can easily get overwhelming! And probably only create marginal, if any, improvement.
So there’s certainly a sweet spot to be found.
The impression I get is that the typical certificate silk shading project for this course will use between 20 and 35 shades of thread. Although that’s obviously somewhat dependent on the exact subject and image.
These are the flower and leaf colours that I’m hoping to recreate for my silk shading project:
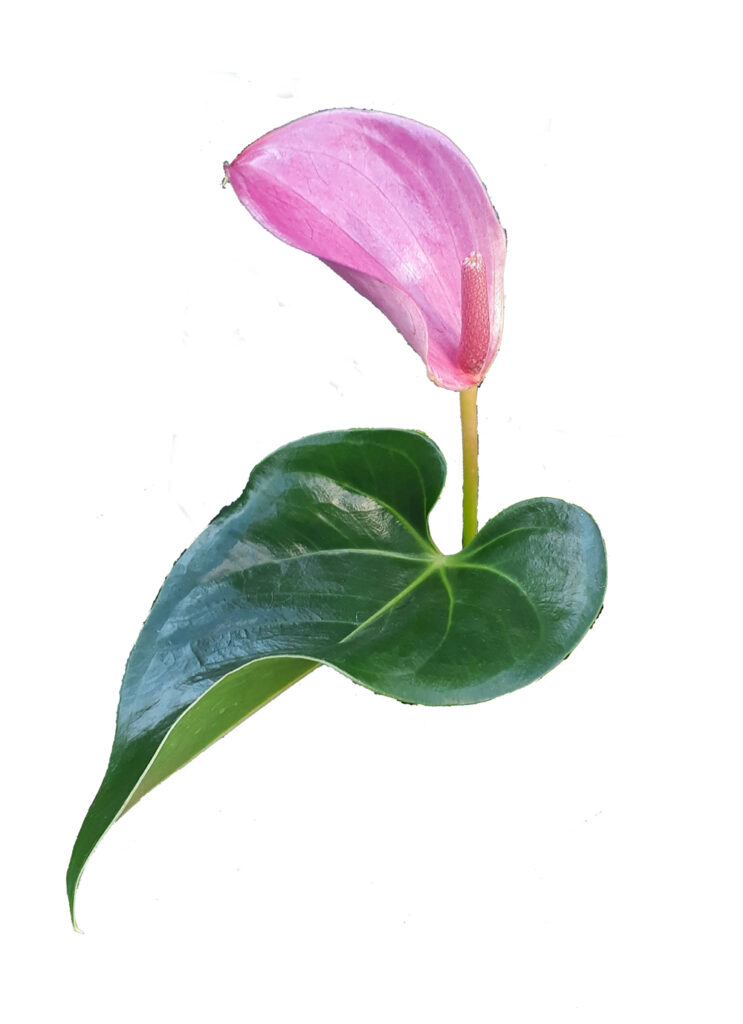
Picking my silk shading colours
How I should pick the colours for my silk shading was something I was very keen to get my tutor’s advice on.
Over the years, I’ve done a bit of painting and drawing. So I’ve got some experience of assessing and picking colours. But I think it’s a very different approach with embroidery. I won’t be able to mix and blend the colours in the way I’m used to. Which will be an interesting challenge for sure!
My tutor recommended beginning by taking my photograph to the thread stands and picking out any colours that I thought might be useful. Then we’d go through a whittling down process together.
Judging from my tutor’s face when I showed her my initial selection, I might have gone somewhat overboard!!
To whittle down the colours, we simply held each skein in turn over my photograph to see if we could find that shade in the picture. Doing this under a good source of natural light is really important. If we could find it, the shade went through to the next stage of the selection process. If not, it went in the discard pile.
Thankfully I ended up with a big discount pile at the end of this review!
Sadly I didn’t take any photos of this whittling down process, so you’ll just have to trust me that I’d gone a bit crazy with my first selection of candidates!
Refining my colour palette
Once we had my refined thread selection, the next step was to sort them by shade and tone.
So we laid out all of the pinks/purples and greens from lightest to darkest.
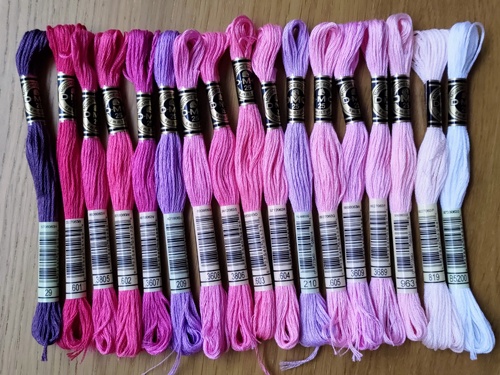
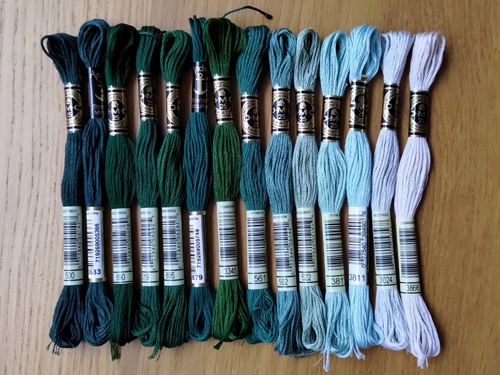
Most of the colours fitted into one of these two main colour groups. There were also a couple of gold threads and different shades of pink and green that made their own little groups.
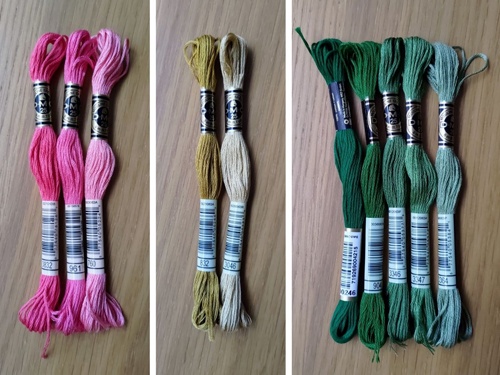
Within the pinks especially, there was quite a variety of shades between pink and purple. But we didn’t worry about sorting those out at this stage, just ordering them by tone.
This allowed us to then see if there were any threads that felt identical. Or very close to being identical. In which case, one of the pair could be discarded.
Another benefit of laying out the threads in tone order like this was that it became very obvious where there was a big jump between shades. For example, at first I had a dark purple that was very different to any of the other shades I had. So this was a good opportunity to check for a shade that would help smooth the difference.
I’d picked one of the white shades of thread as part of my selection. However my tutor said I was unlikely to need this. I’d picked it for the highlight within the petal. But she advised that the white thread would likely end up looking too harsh. So in reality, a pale pink would likely be a nicer way to create the effect.
Once we’d made our ‘final’ (for now!) thread selections, I took photos of them laid out in colour order with the thread numbers visible. An important reference should I get things mixed up at home!
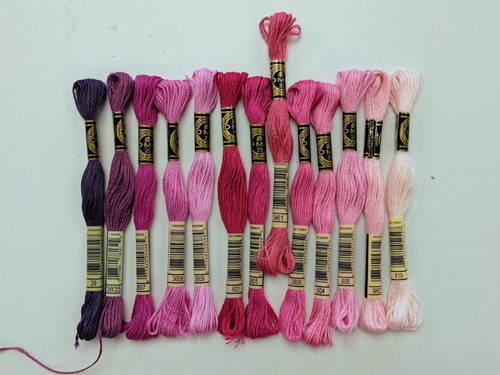
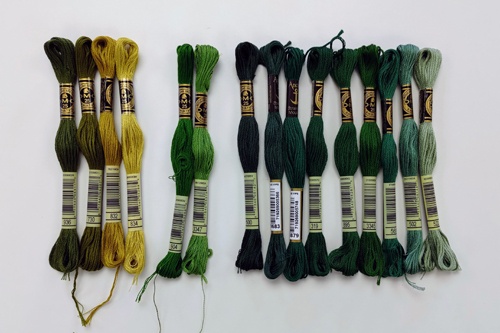
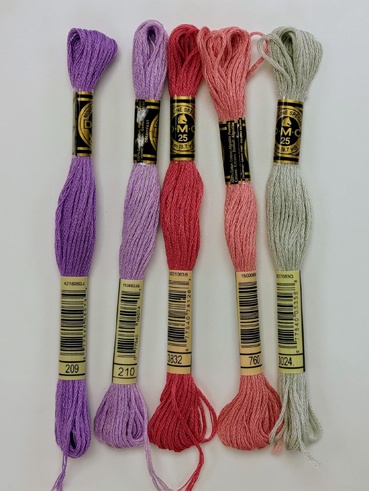
We also had a small selection of ‘maybe’ colours that I also took a photo of for reference.
Shade sampling
You might think that now that I’ve got my colours selected, the next step would be starting to stitch my design. Well, not yet!
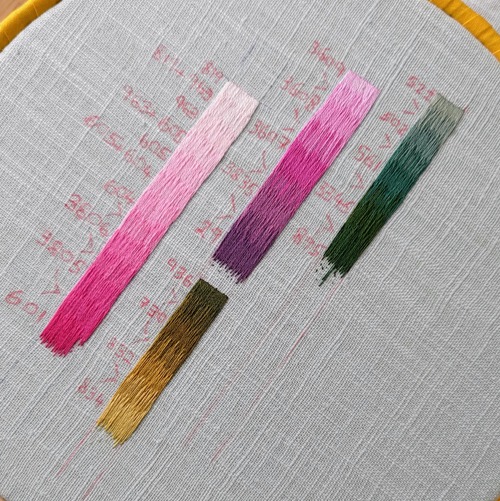
First off, there’s a fair bit of sampling to do. I was instructed to stitch colour bands of my shades. From my understanding these serve a few purposes:
- They’re a useful reference to use while I’m stitching. Seeing a block of colour as stitched can be very useful. It’s also important to stitch these colour bands on the same shade of fabric as your actual piece. Because the background colour can affect how you see the thread shade.
- They’re an additional check of whether I had too many or too few shades. For some of my greens, I couldn’t really tell the difference when switching from one shade to the next. Which meant I could lose one of the ‘duplicate’ shades to keep things simpler. Conversely, some of the transitions between my pink and purple shades felt a little stripey. So this was a good cue to check whether there’s an in between shade that will help me to create a smoother transition.
- Equally as important, all this sampling gave me good practice at the long and short stitch that I’ll be stitching my flower with! This ‘low stakes’ practice helped me to get a better feel for how dense my stitching needs to be to completely cover the background fabric. As well as being useful practice for helping me to get better at controlling the direction of my stitches.
Flower sampling
Once I’d done my shading bands, there was still more sampling to do before I started stitching my actual piece! My tutor strongly recommended sampling the first part of the flower that I’d be stitching.
So I sampled the stem and the top of the flower petal as additional homework.
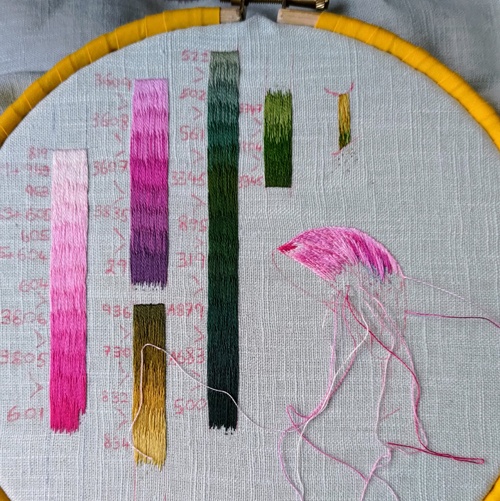
This was actually very helpful. For one, it confirmed what everyone had been saying about how stems tend to have a habit of growing! I.e. you tend to end up stitching them wider than they strictly are.
It was also incredibly helpful to start having a go at working with multiple colours at once and blending across the range of colours. For my petal sampling, my tutor noted that the right hand side of it looked too pink, so I knew I should make sure I use more of the purple shades when I stitch that part for real.
I was finally given the go ahead to start stitching on my actual piece…
Stay tuned for the next instalment to see how that goes!