
Today I thought it’d be fun to go behind the scenes and share with you my design process for a new embroidery. As with so many things in life, good preparation makes for a much better result!
I like to make things as tangible for you as possible. So I’ll be focusing on the process I went through to design my crewel embroidery turtle and coral reef. The steps are not always exactly the same, but this will give you a good idea of how I approach the process of creating an embroidery design.
So what do you want to stitch?
First up, you need to know what you want to stitch. Sounds pretty obvious right!?
But it’s not just important to know what you want to stitch. I find it very useful to also get clear on any requirements or constraints that I have for my design.
If you’re immediately feeling rebellious at the thought of imposing constraints on yourself, hold up a moment! While having total carte blanche can sound exciting, I’ve often found that it can quickly start to feel overwhelming.
For the turtle design, I knew that I wanted it to fit within a wider Costa Rica collection that I’m creating. This would be the second design in the series after my hummingbird:
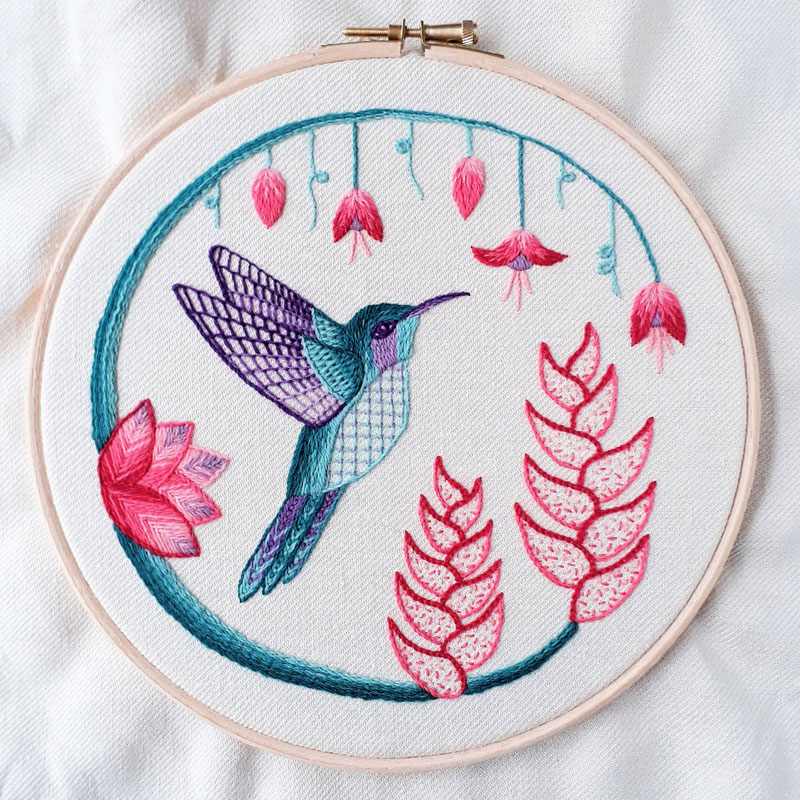
To create a cohesive feel to the collection, I decided that it should also be a circular design to fit in the same size hoop as the hummingbird. I also liked the colour palette restriction I’d given myself with the hummingbird, so I decided to repeat that. Three colour families with a light, medium and dark shade within each.
Another decision I made about my Costa Rica collection was that I wanted each piece to feature an animal found in Costa Rica. Ideally, each being one that I encountered on a fabulous trip I had to the country a few years ago.
I’ve got a long list of animals for future design ideas! A turtle was, for me, one of the no-brainers of the collection so it was easy to pick that as my subject.
Why was a turtle a no-brainer for me?
There were a couple of different reasons why I wanted to create a turtle design.
Firstly, since doing a school project on Costa Rican turtles, the animal and country have always had a close association in my brain.
Secondly, turtles remind me of a special experience that I had the first time I ever went snorkelling. I’ll save the full story for another time, but in summary, I ended up swimming above a little coral cove just me and a turtle. It felt truly magical!
You of course don’t need to have a backstory or multiple reasons for wanting to create your design. However, I do think it can be useful to take a moment to think about the kind of feeling and energy that you want to create in your design. Understanding your reasons or backstory can be helpful guides for this.
Initial sketches
So now I knew what I was designing – a turtle in the context of a coral reef. And what my constraints were – a circular design to be framed in an 8 inch hoop and a colour palette of light, medium and dark in three different colour families.
The next step was to start sketching!
At this point, I’m just exploring different elements or motifs that I could use in my design.
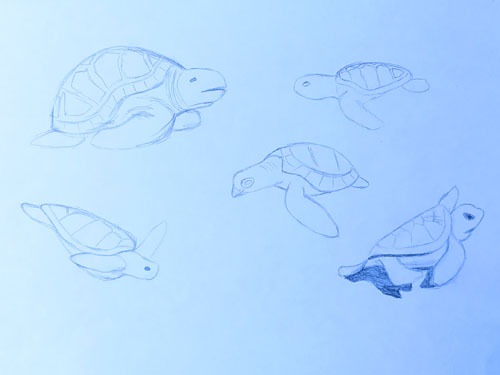
Since the main focus is the turtle, I started with a few quick sketches of turtles. This helps me to get familiar with the subject and I gradually begin figuring out how I’ll represent it in my design.
One thing to think about is what level of detail and how lifelike do you want your design to be?
For my crewelwork designs, I want a simplified representation of the animal rather than something very lifelike. Almost like a form of cartoon.
So my sketches will often start out more lifelike and then I’ll go through a process of simplifying as I figure out what are the key characteristics that make the animal recognisable.
I’ll then go through the same process with other parts of the design. So in this case, corals that can make up a coral reef scene. Again, I tend to start making more detailed sketches that I’ll refine down into simpler shapes.
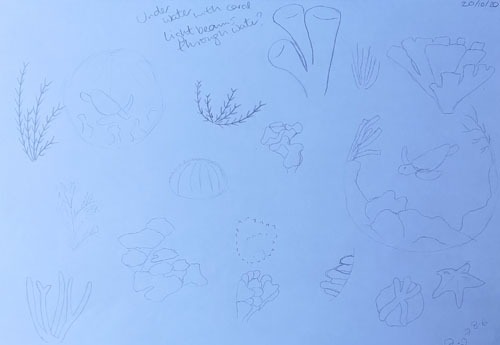
Pulling it all together into an embroidery design
Now that I’ve built up a collection of subjects and motifs that I might want to include in my design, I’ll start sketching out some ideas for the composition of the full design.
These typically start out very rough and ready, just to give me a feel for whether an overall composition idea is pleasing. Then once I’ve got an idea I like, I’ll start considering how to use my motifs to build it.
This part of the process often leads to me making further refinements to motif ideas so that they’ll fit better in the design. I’ll often also find I have a part of the design where none of my motif ideas quite fit. So I’ll then start exploring and sketching out some additional motif ideas.
The process of putting all my subjects and motifs together to make my composition usually takes a few rounds of refinement. As you can see in this early draft, there was rather a lot going on!

So on the next revision I simplified it by taking some things out and moving around some other elements.
Colours and stitches
It’s usually around the time that I’m refining the design that I also start to think about the colours and stitches that I’ll use.
For colours, I’ll use my Appletons wool shade card to pick a selection of colours that I think will work well. Then I’ll start colouring in my design. I’m looking for a pleasing distribution of colour through the design, which sometimes leads to adjustments to the design itself. The most common adjustment I’ll make is even further simplification!
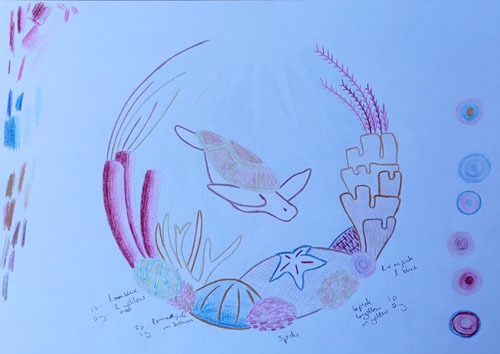
For stitches, I find there are some shapes that lend themselves very obviously towards certain stitches. Sometimes I’m even thinking about this at the initial motif exploration phase. In which case I might sketch the motif to make it deliberately suitable for a certain stitch.
A good example of this in the turtle design are the spiky coral vines. Early on I had the feeling that these would be a great use of fly stitch.

Other motifs can take more thought. I also like to challenge myself to keep exploring new and different stitches.
So at this stage of my embroidery design process, I’ll often do a bit of sampling. Some sampling might simply be practising a new to me stitch so that I’ve got a better feel for how to use it in my design. I’ll also do some sampling to try out different stitch and colour combinations for a section of the design.

As you can see, my sampling approach is to simply do what’s necessary to answer the questions I have. Once I’ve figured out if something will or won’t work, I’ll often just abandon that stitching to move on to the next thing!

Finalising the embroidery design process
I’ll keep refining the design through new sketches, colour combinations and stitch ideas until it feels like it’s all clicking. Then I’ll create a tidied up design outline that will be transferred onto my fabric.
I print out a couple of extra copies of my design outline and from them I create my colour plan and my stitch plan. Then I have all I need to start stitching!
Even with all that preparation, it’s not unusual for a little bit of unpicking and adjusting as I stitch the final piece. I guess in some ways, the embroidery design process doesn’t end until my embroidery is finished! There are always going to be some things that don’t really become clear until you see them in the context of the whole.
But my preparation and sampling sure does minimise the amount of unpicking required!
Letting someone else do the preparation for you
I have to say, going through the process of creating embroidery designs from scratch very quickly made me appreciate all the hard work that goes into creating an embroidery kit or pattern!
Sometimes all I want to do is stitch, so I’m very grateful for all the wonderful kit and pattern options out there. I especially love them for learning a new type of embroidery. And of course there are some designs that I simply love and can’t wait to enjoy the pleasure of stitching them!
If you love my turtle and coral design and want to stitch it yourself, it’s available as both a kit and a PDF pattern from my shop.

I like to have a mix of projects on the go to suit my various stitching moods. Having a kit or two on the go is great for when I’m in the mood to simply stitch and not have to make decisions!
Have a go!
On the other hand, when I do have more brain capacity, it is incredibly satisfying to finish a piece that you’ve envisioned from start to finish. So if you’ve got a desire to create your own, totally unique embroideries, I’d absolutely encourage you to go for it!
Have you designed your own embroideries or do you prefer to use kits or patterns? I’d love to hear about your stitching dreams and ambitions!